Hello everyone, today we are going to learn about hair masking. This easy tutorial will help you remove the background from any crazy and curly hair images. You can also replace any backgrounds in your hair images by following this tutorial.
Not only hair masking, but also you can mask-like fur type clothes or anything. In this tutorial, we are going to use Adobe Photoshop CC 2021. But to complete this hair masking, you may use any version of Adobe Photoshop.
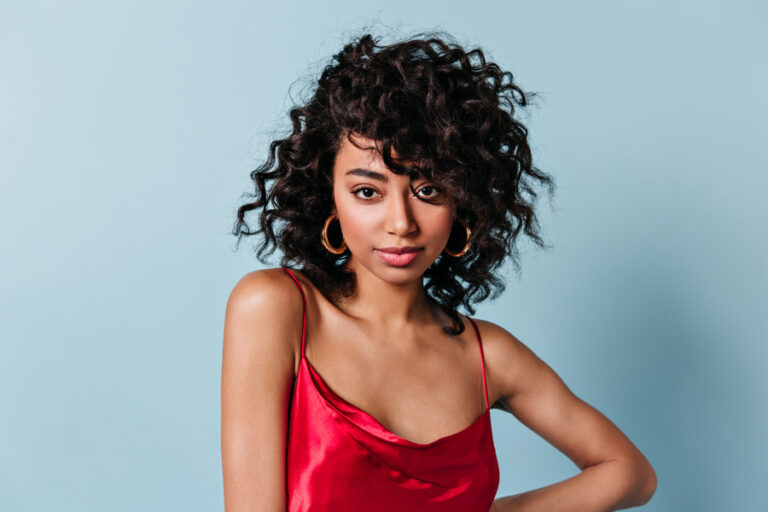
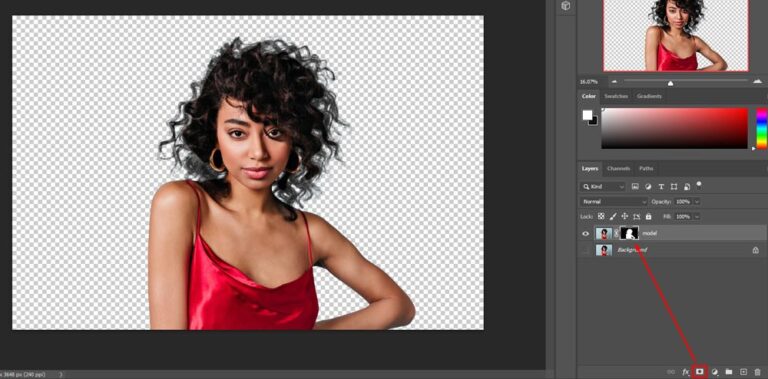
Here is the photo that we will start with to do Photoshop hair masking.
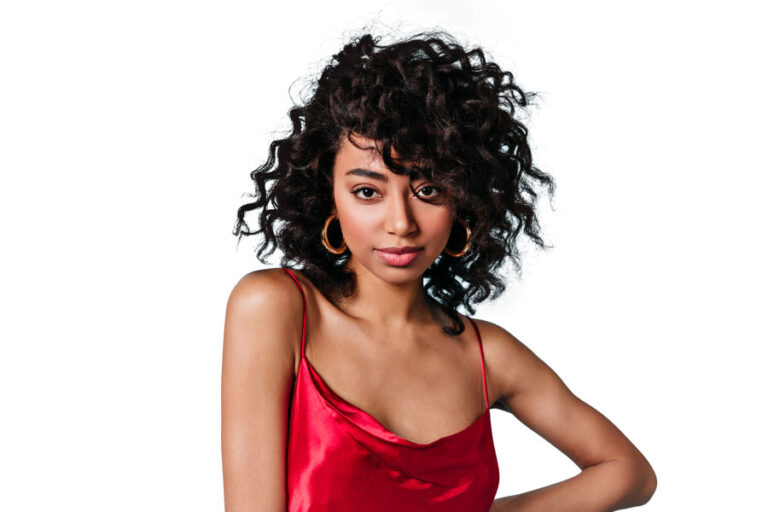
And after doing hair masking in Photoshop, the final result will be like the below image.
You can see the difference between the two images and how they look after Photoshop masking. It’s not that difficult to do this, but you may not get an accurate result if you are a beginner. That’s why this tutorial was made for.
Let’s see how to use a hair mask.
Table of Contents
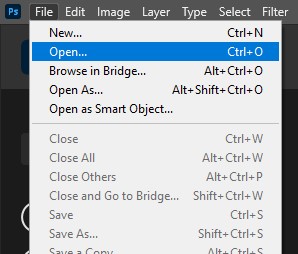
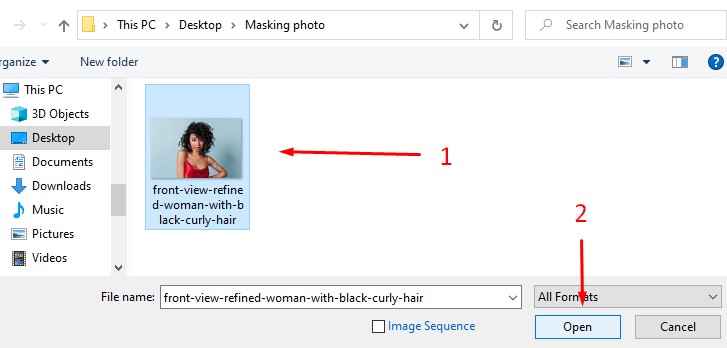
Step 1: Open the Image
First, open Photoshop CC and click on File > Open (Ctrl+O), then select the image you want to use for masking.
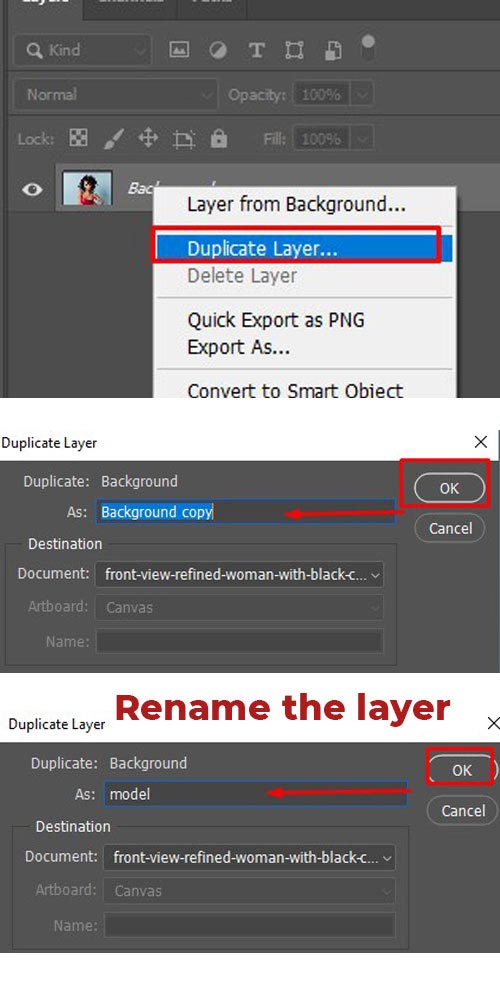
Step 2: Copy the Background Layer
After Opening the Image, you need to copy or duplicate the background layer. To do that, select the layer, click on the right button of your mouse, and click on “Duplicate layer.” You can also use the shortcut key by pressing Ctrl+J to copy the background layer.
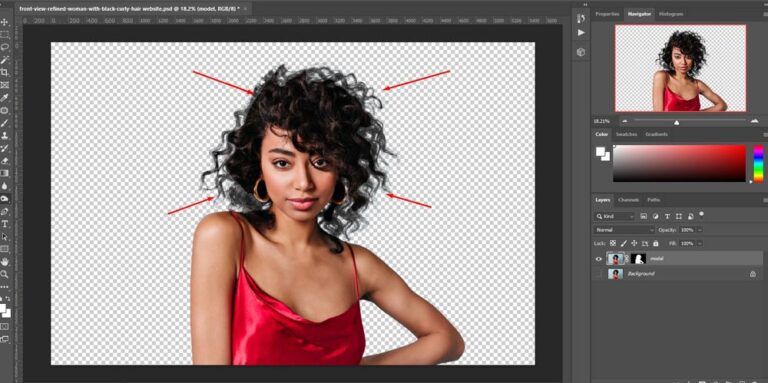
Here I have renamed the background copy layer as “model.” You can simply leave it as it is. And then, we will turn off the background layer and work on the duplicate layer. Because if anything wrong happens, we can restore our original image.
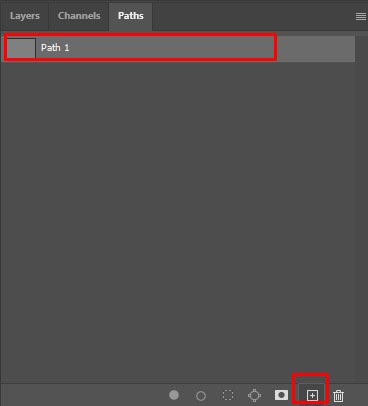
Step 3: Create a clipping path
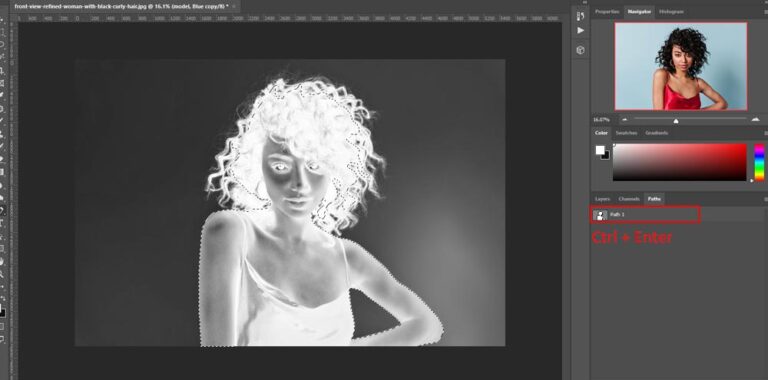
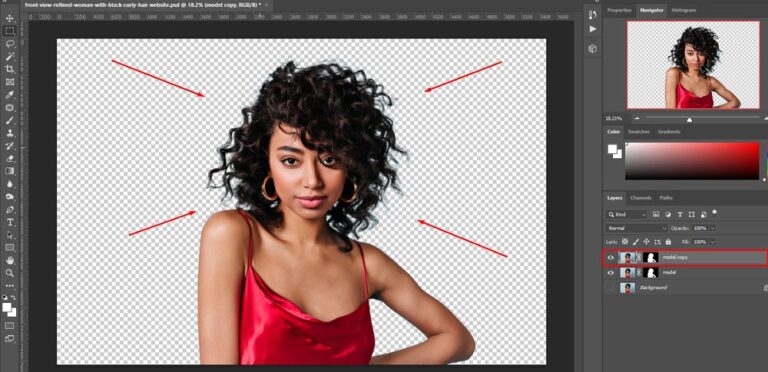
We have to select the whole inline area to separate from the outline area to do hair masking. For that, we can use the Lasso tool or any other selection tool. But in this tutorial, we will use the Photoshop Pen Tool to create a clipping path and select the inline area.
Select the pen tool (P) and draw paths around the image without the outline area. And remember to go to the paths tab to create a path layer by pressing the (+) or add icon that can be found below.
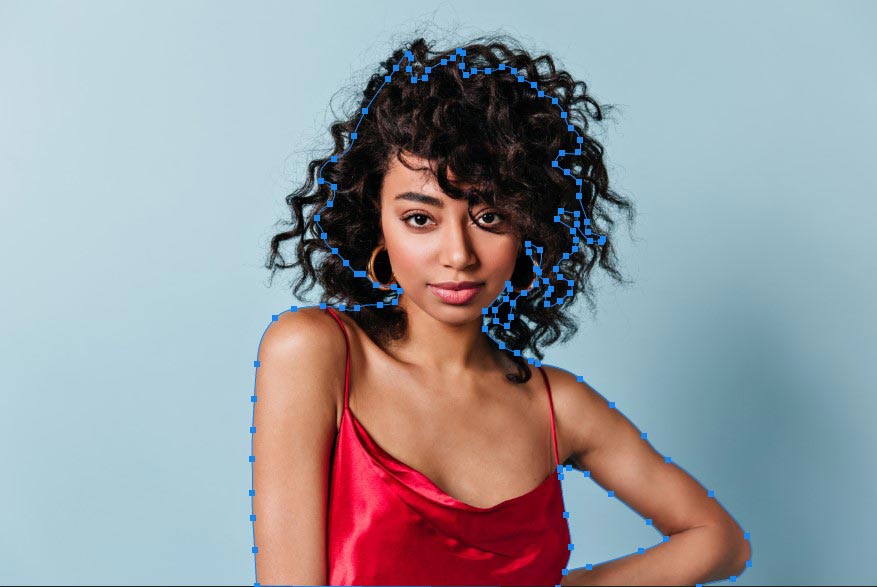
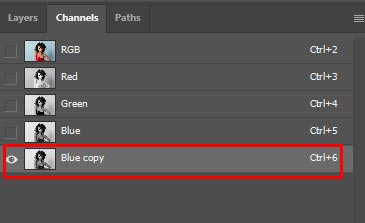
You need to go to the channels tab, select only the blue one, and then copy it by dragging it into the (+) icon. We will work on the copied channel and leave the original one intact.
We will get a duplicate channel of blue copy like below
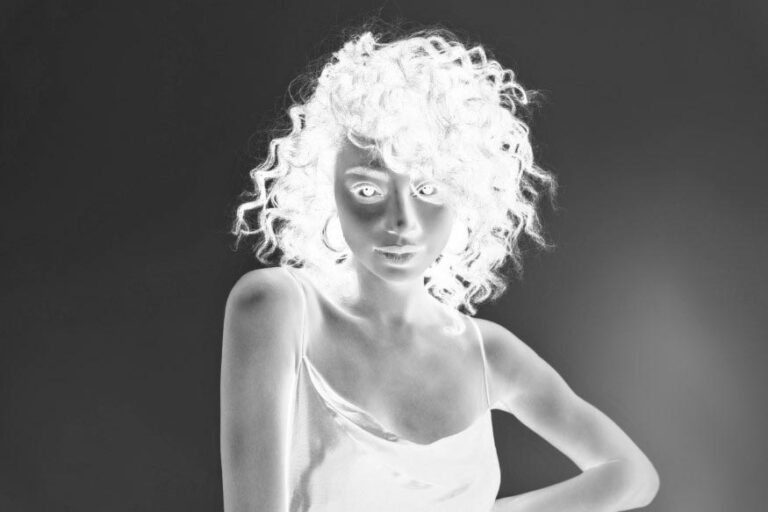
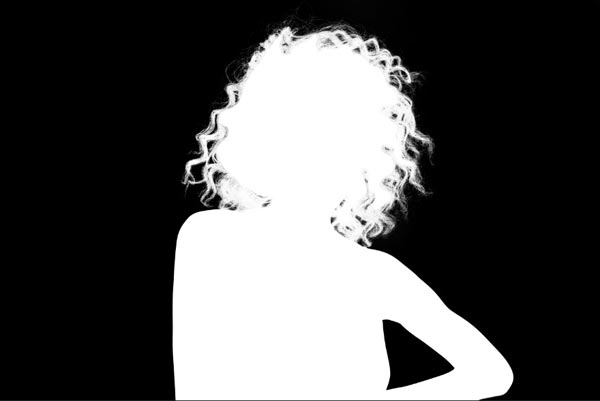
Then, we will press Ctrl + I. You the image will look like this
Step 5: Fill the Selected Blue Channel with White color
We need to select the path and press Ctrl + Enter to select the path area. And fill the selected area with pure white color by pressing Alt + Delete/Backspace.
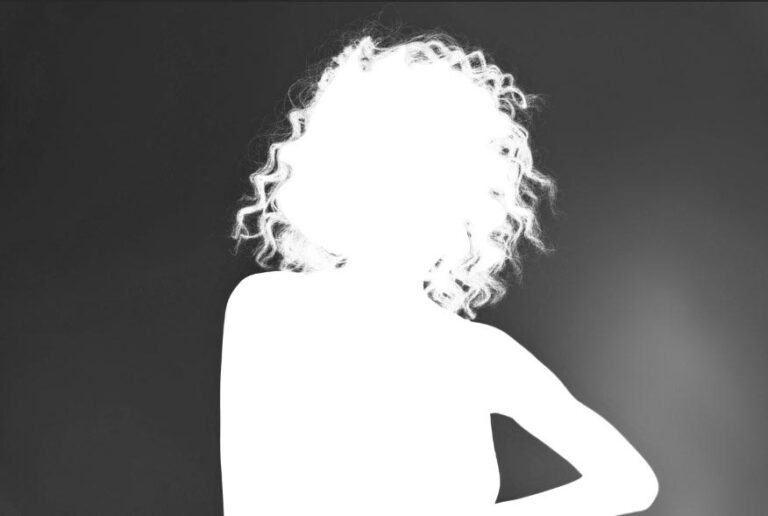
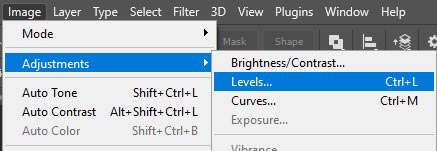
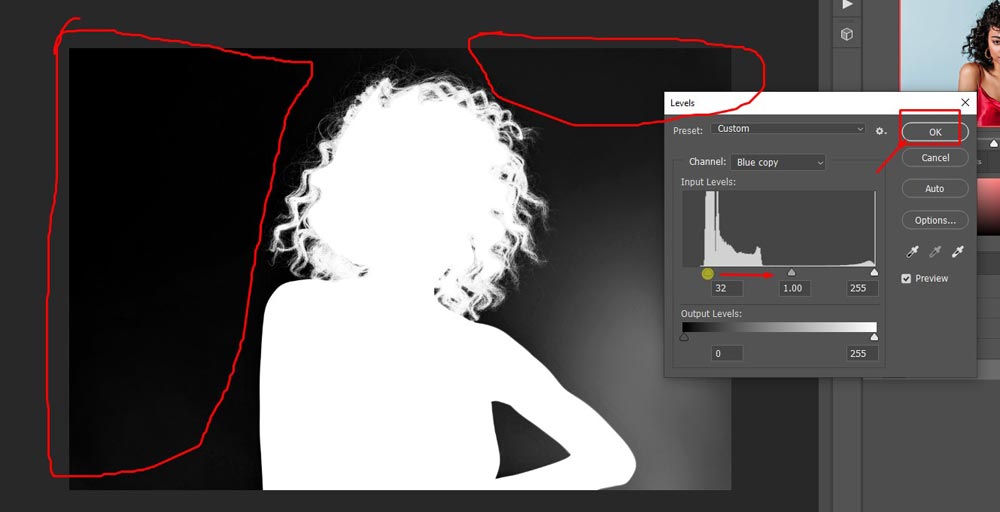
Step 6: Make the Background Color Dark
When you have to do with the model to make the selected area white, you need to make the background area dark or black. For that, you have to go to the image> Adjustments > Levels.
Then you need to drag the pointer slightly to the right and see if the background’s white areas disappear. Do not drag much, because the hair will also disappear if you do that. We need to do that carefully.
Step 7: Erase the White Areas from the Background
Select the burn tool from the left tool panel, set the range to shadows, and make exposures less, like below 10% or as you need. For my image, I have used 6% exposures here. And drag the circle in the whole picture. You will see that the white will disappear from the background. And it will be fully dark.
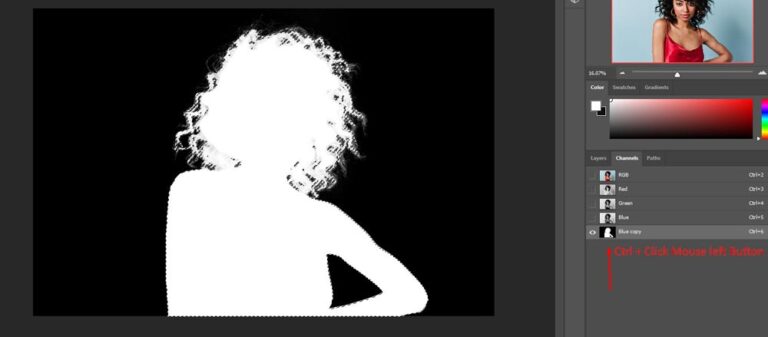
Step 8: Create Layer Mask
Now, press Ctrl and click on the blue copy layer to select the image
Then go to the layer panel and click on the add layer mask
After adding a layer mask, only the selected area will become visible ultimately. But the outside area will not appear completely. You can see this in the below image.
Step 9: Copy the layer mask
You need to copy the layer mask to make all hair areas visible. To do that, select the layer mask and right-click on your mouse, and then click “duplicate layer,” or you can also use the shortcut key by pressing Ctrl + J to copy the layer mask.
As you can see in the image, the hair density is now fine.
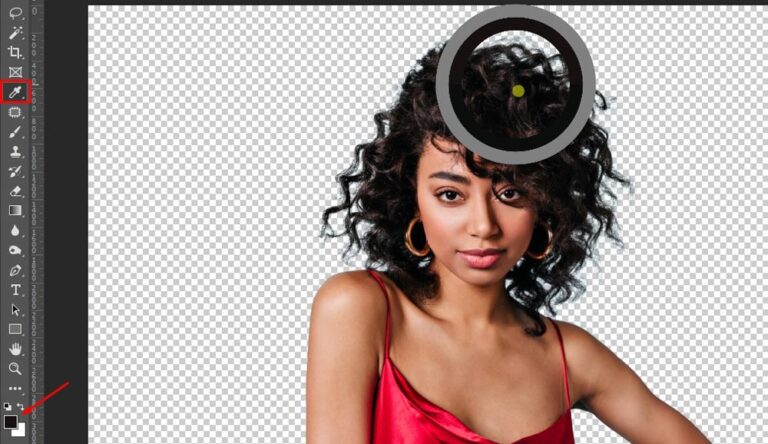
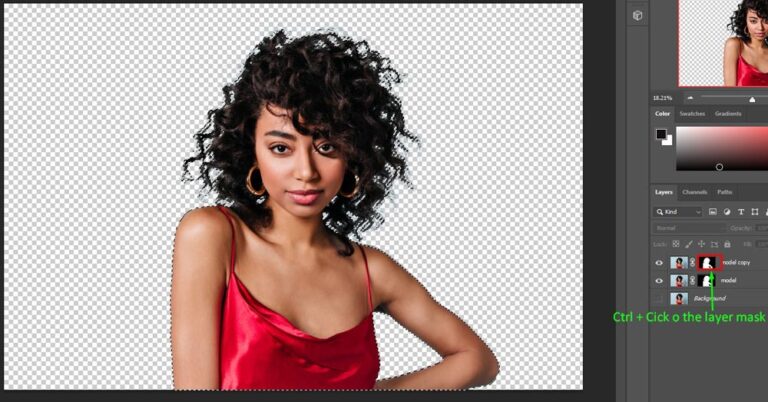
Step 10: Pick a Color and Create a New Layer.
We need to pick the hair color with the eyedropper tool, possibly from the darker area. And then create a new layer. Then select the image by pressing Ctrl + mouse left click button in the 2nd layer mask.
Step 11: Select the 2nd Layer Mask and Fill it with the Foreground Color
Now select the 2nd layer mask by pressing Ctrl + mouse left click button in the 2nd layer mask. See the below image to understand it properly.
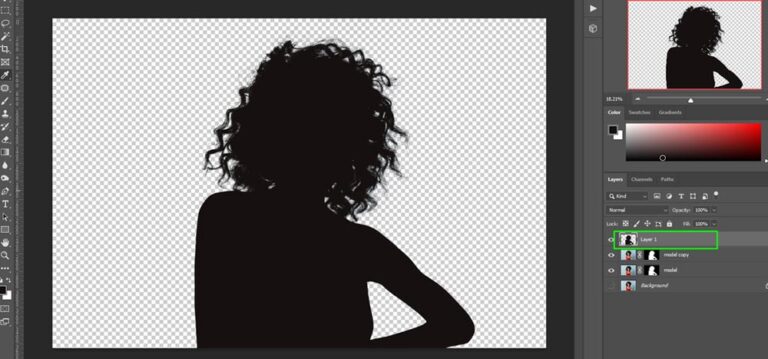
Now fill the selected area by the foreground color by pressing Alt + Backspace. Then deselect it by pressing Ctrl + D.
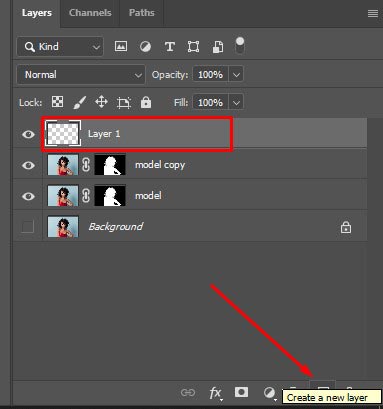
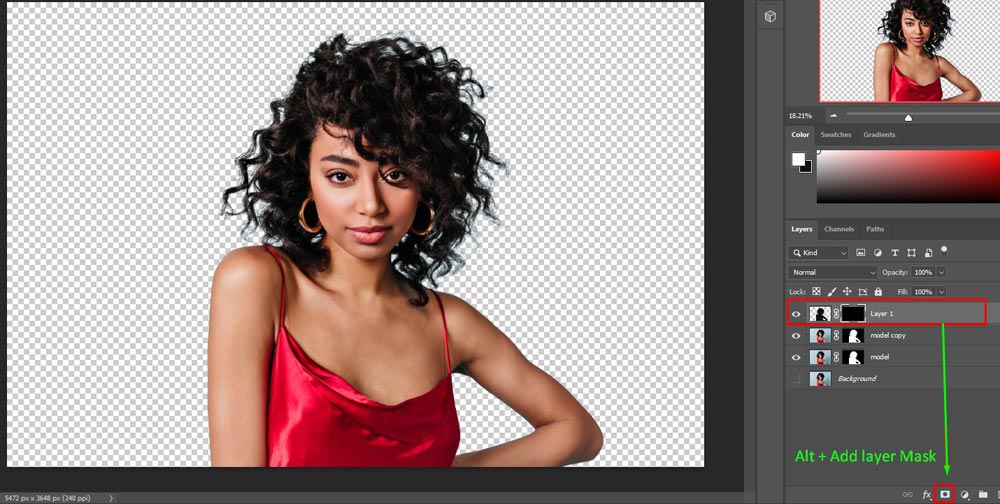
Step 12: Hide All the Area by Adding another Layer Mask
For hair masking, now we need to hide all the area by adding another layer mask. Press Alt + Add layer Mask. You can see the image below to do it.
Step 13: Select the Brush Tool
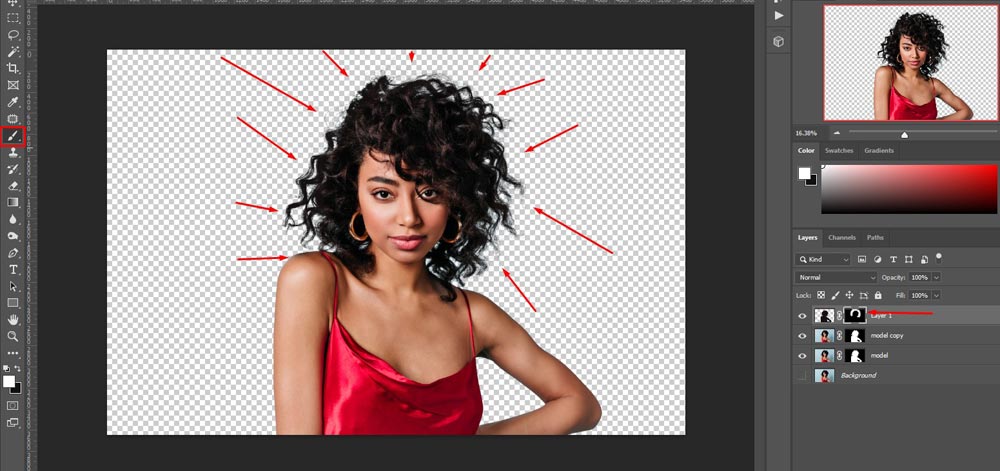
Then select the brush tool and drag the pointer in the outline areas of the hair. It will now darker the hair parts and make them visible.
We need to do it carefully and slowly to make it smoother after finishing it. You will see the final result. Now you can use any background behind the hair image. We are using the white background here as it is the most popular color for these kinds of hair images.
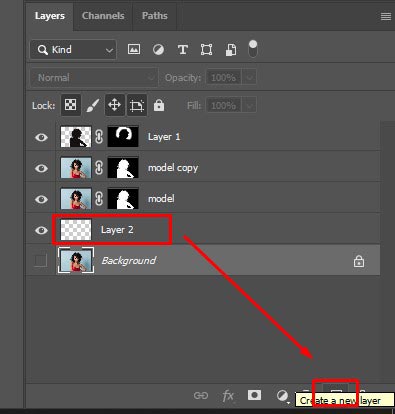
Now we will add the background color. To do that, select the Background Layer and then create a new layer by pressing the (+) icon or by pressing create new layer option in another version of Photoshop.
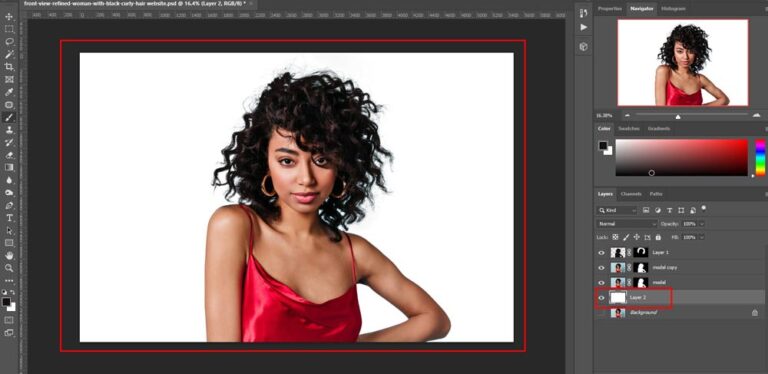
After that, select the layer and fill the layer with the white color. Just use the Ctrl + Backspace to paste the background color. Before pasting the color, make sure you have set the background color as white. We will get this image after filling the layer with white color.
Remember that you can use any color or any background in the layer.
This was the most straightforward tutorial about hair masking, and this took only 8 – 10 minutes to complete the task. And surely, you can see the result and difference between the raw and final image. This is how we use hair masking in Photoshop. We hope this tutorial helps make you understand everything about hair masking. Please keep your eyes on our blog to get more Photoshop tutorials in the coming days