Photoshop Sky Replacement an Easy Tutorial to Change the Sky in Photoshop
The purpose of this tutorial is to show you how to do Photoshop sky replacement. Using Photoshop pen tool and a layer mask, we’ll separate the sky from the foreground, and then we’ll show you how Photoshop’s blending mode can be used to hide the original sky and replace it with a new one!
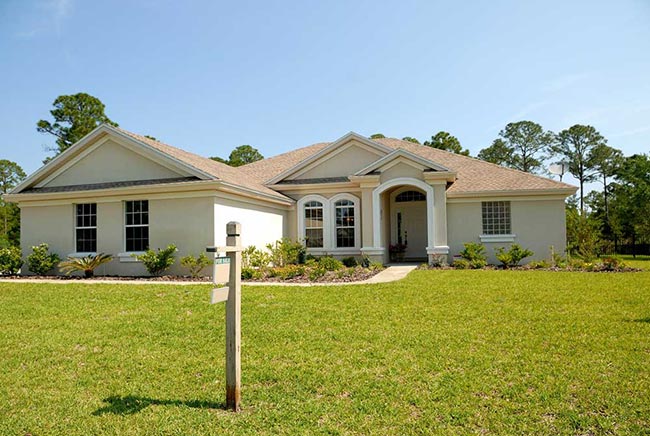
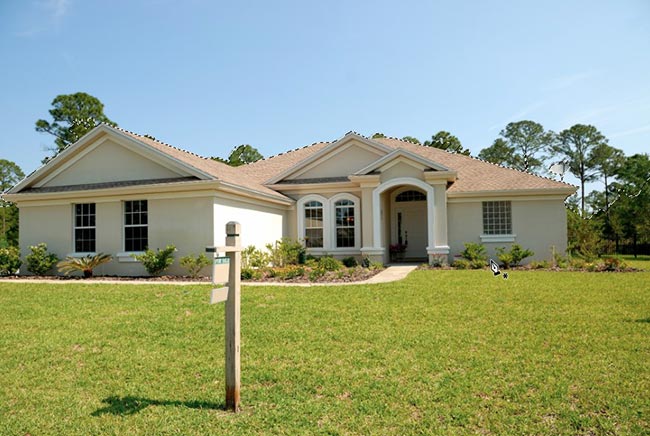
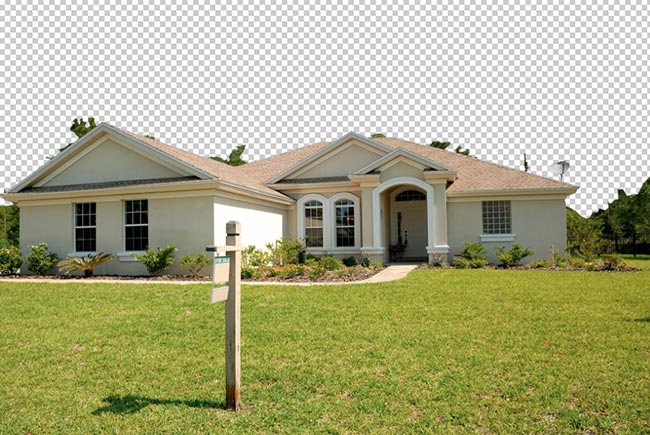
This is the Photo I’m going to start with.
Because of the leaves and branches on the trees and the sunlight poking through, I chose this photograph. For selecting the original sky, you might think that the Magic Wand or Color Range command would work well, but today’s tutorial discusses how you can use the Layer Style dialog box’s Advanced Blending sliders to both select the original sky and hide it at the same time.
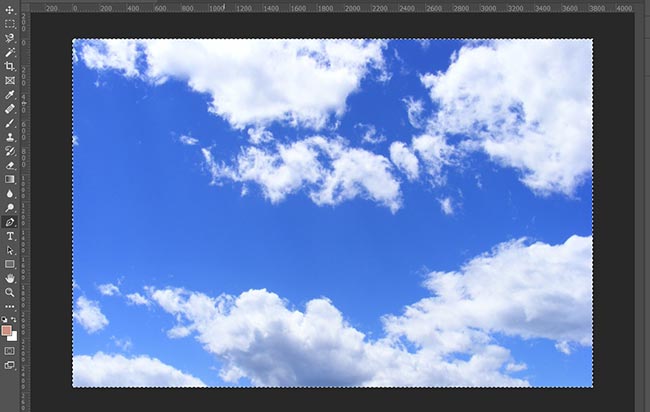
As a Photoshop sky replacement for the original sky above, here’s the image I will be using
Before proceeding, it’s important to note that both of these photos have the same size (width and height). If you want to keep things simple, make sure both of your photos are the same size, so you may need to resize one of the first.
This is how the final result will look after doing the Photoshop sky replacement by adding the new sky.
For this tutorial, I’m using Photoshop CC 2021, but any version of the Photoshop software will work for it. So let’s get started!
Table of Contents
Step 1:- Open the Photo For Sky Replacement
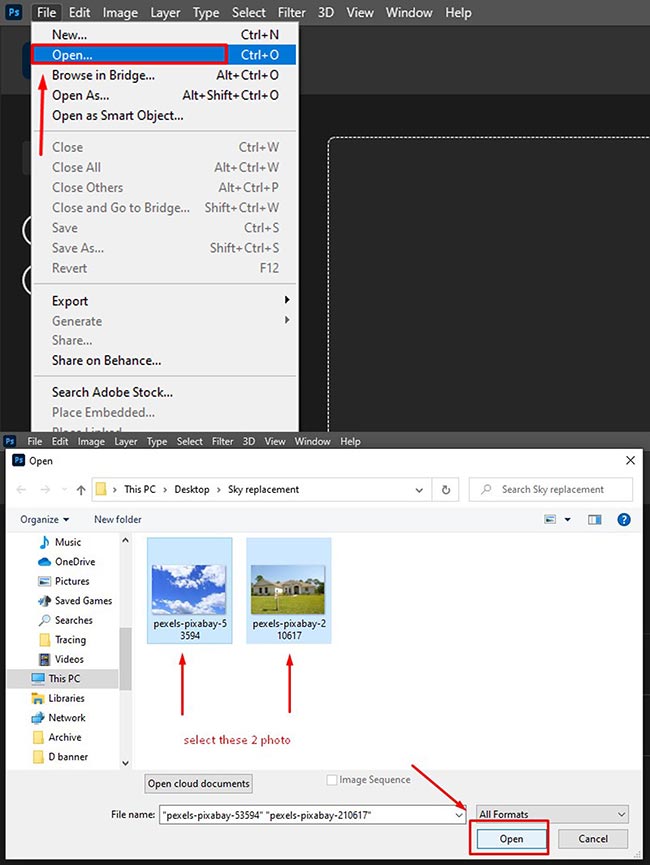
For Photoshop sky replacement, first, you have to take the original Photo and sky photo into the Photoshop cc dashboard. For that you need to click on File > Open (Ctrl + O) > Select the Images > Open. Check the images below on how to open the file.
Step 2:- Duplicate Layer Creating
After that, for the original Photo, we will copy the background layer twice and turn off the main background layer. To copy the background layer, just select the layer, click on the right button on the mouse and then click on “duplicate layer” or use this shortcut. Select the layer and press > Ctrl + J twice.
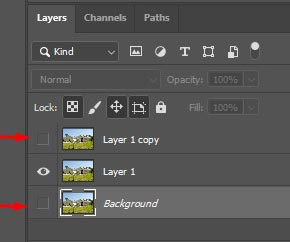
Step 3: Turn off Background and Layer 1 Copy
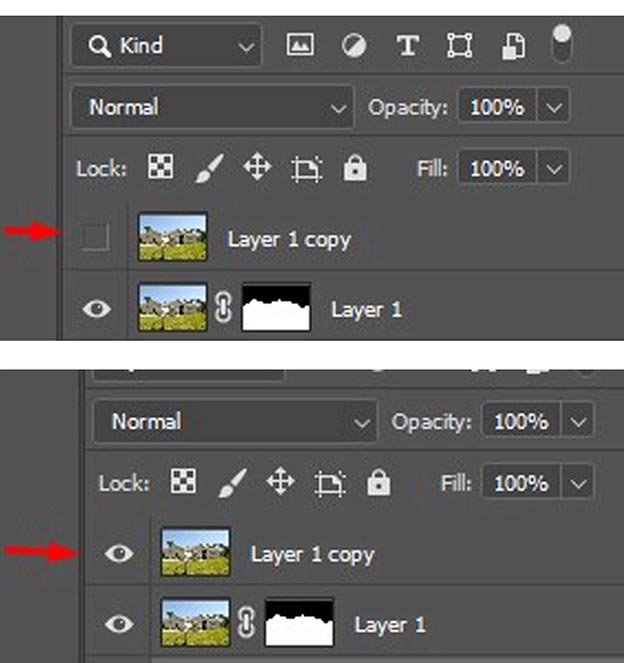
Then turn off the “Background” layer and the “Layer 1 copy”.
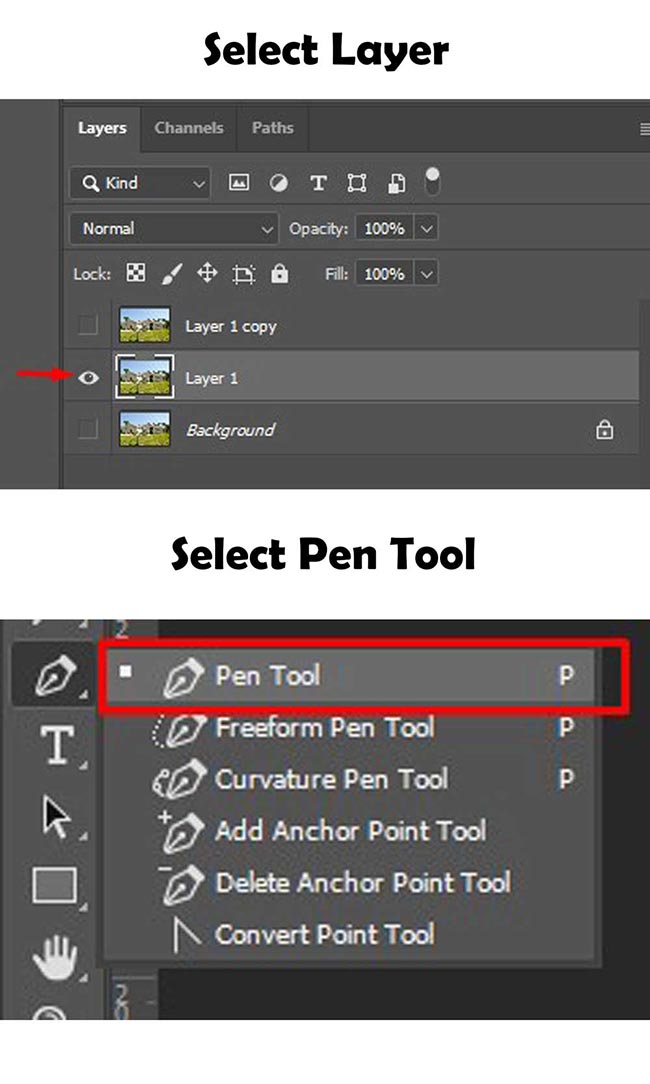
Step 4: Select Layer 1 and Select Pen Tool
Select layer 1 first, and the next step will be to draw a selection outline around the part of the Photo below the sky. To do this, you can simply use Photoshop’s standard Lasso Tool. But for a perfect result, I will use the Photoshop Pen tool, which I select by clicking on the Pen Tool icon in the left Tools panel. Or you can simply use the shortcut by pressing “P” on the keyboard.
Step 5
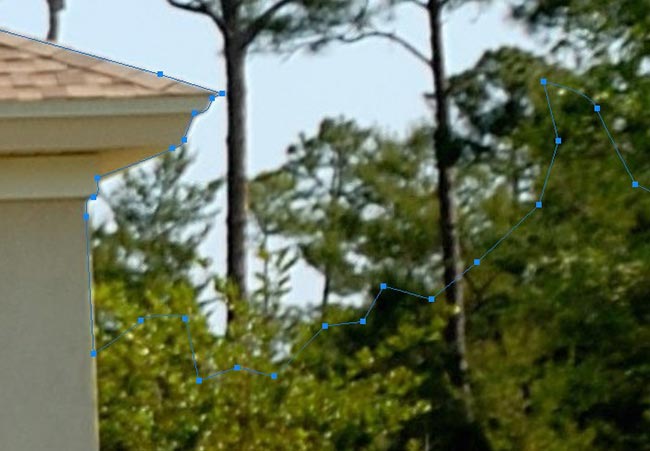
After that, create clipping paths with the Photoshop pen tool without the sky. Remember that we have to separate the sky from the non-sky area below. So, every single hole of the tree branches will be considered a sky part.
Next, you have to select layer 1 and press (Ctrl + Enter) to select the foreground area of the sky.
Step 6
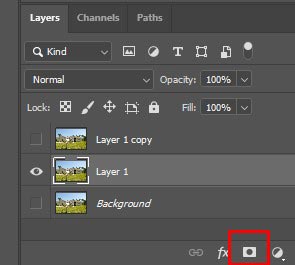
The area we’re protecting is now selected, so let’s create a layer mask. Click on the Layer Mask icon at the bottom of the Layers panel:
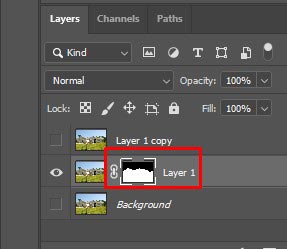
In Photoshop, a new layer mask is added to Layer 1. When we look at its preview thumbnail, we see that the selected area is filled with white. Which means the selected area remains visible in the document. Black surrounds the area that was not selected, which should be hidden from view now.
As we can see from the below image in the document window, that is indeed what we see. There is still visibility in the area I selected, while the area above it has been hidden,
Step 7
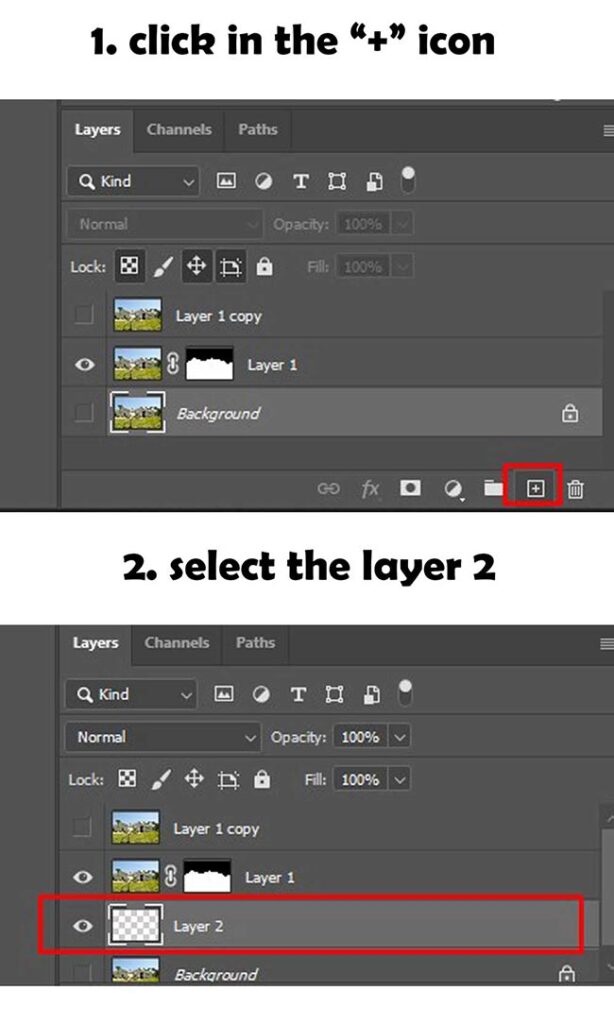
We need to create a layer under layer 1. To create the layer, we need to select the background layer and click on the “+” icon as shown below in the image. Then it will create a layer named “layer 2”.
Step 8
Now we will take the sky image into our main Photoshop sky replacement document. For that, first, go to the sky document window in the adobe Photoshop cc, which we have opened for the first time. And select the hole image by pressing “Ctrl + A”
Then press “Ctrl + C” to copy the selected area and go to the main Photoshop sky replacement document again. After that, select “layer 2” and paste the sky image into “layer 2”. In the original photo, the sky has been replaced, but it doesn’t look very professional yet:
Step 9
Now select the “layer 1 copy” and active the layer by clicking the visibility icon on the layer’s left side. See the below image for a better understanding.
After activating the layer, the entire original Photo will reappear.
Step 10
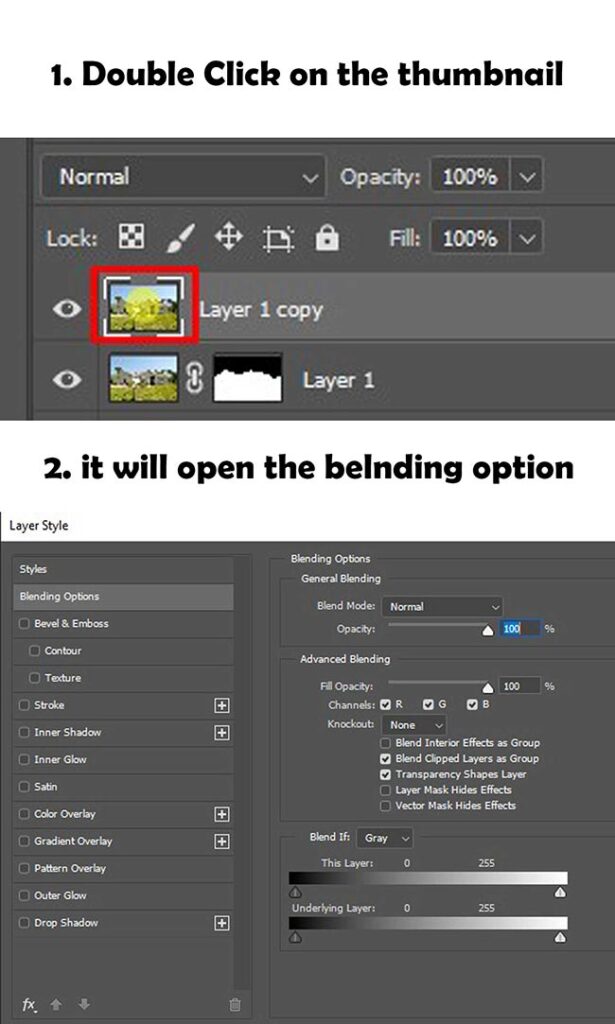
For Sky replacement in Photoshop, what you have to do is now double click on the “layer 1 copy” thumbnail and open the blending option.
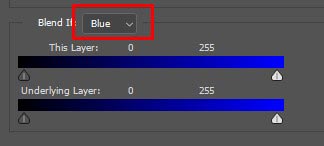
At the bottom of the dialog box, we need to look for the two slider bars in the Advanced Blending section. In the Blend If the option above the slider bars, Gray is the default setting. If you click the gray word and choose Blue, the following will appear:
Step 11
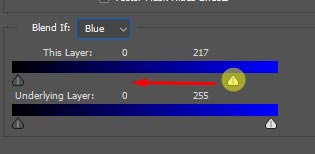
When you change the color to blue, you will see the two slider bars change from black-to-white to black-to-blue gradients. Skip the slider bar at the bottom. What we’re looking for is the top layer (the one that says This Layer above it). Begin dragging the small slider to the left of the top bar by clicking on it below the far right side of the top bar
The original sky will disappear as you drag the slider, leaving behind the new sky. We can see that the slider is not affecting the area we selected back in Step 5. It is only affecting the sky itself. Slide the slider to the left until the majority of the original sky has disappeared.
Step 12
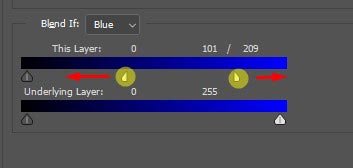
Unfortunately, our trees and leaves have a lot of hard edges and fringing, which are remnants of what the original sky looked like. To fix the problem, we need to soften the transition between the two photos to split the slider in two.
Once the slider has been released, press and hold the Alt (Win) / Option (Mac) key on your keyboard. Continue dragging the slider towards the left while holding down the key. As a result, the slider will be divided into two halves, each of which can be dragged independently. By increasing or decreasing the distance between the two halves of the slider, we can adjust the softness of the transition between the original Photo and the replacement sky photo.
As you drag the slider left or right, keep your eye on the image in the document window until all of the fringing around the trees and leaves have disappeared.
Click OK in the top right corner of the Layer Style dialog box when you are done. My final result after removing the fringing will look like this:
We’ve got it! Here’s how you can easily replace the sky in a photo using a selection, a layer mask, and Adobe Photoshop’s Advanced Blending controls! We hope. It was a very easy and helpful Photoshop sky replacement tutorial.