Hello everyone I’m Hasan Mishuk , last week I discus about how to remove background around hair in photoshop and today I will let you know how to add drop shadow in photoshop. Add a drop shadow is a very demanding service regarding e-commerce. Most of the e-commerce platform prefers a white background photo to display their products. So, the web-shop owners use professional photo editing service to remove background from their photo and replace with a white one. After replacing a natural background a photo becomes artificial and loses its real look. You can avoid that unpleasant issue by adding a shadow.
Table of Contents
Let’s Start Our New Tutorial How to Add drop Shadow in Photoshop
There are many techniques to add shadow in a photo as well as there are various types of shadow like drop shadow, reflection shadow and natural shadow. Our today’s topic is to how to add drop shadow in photoshop.
#Step 1 Open the Image and Make clipping Path:
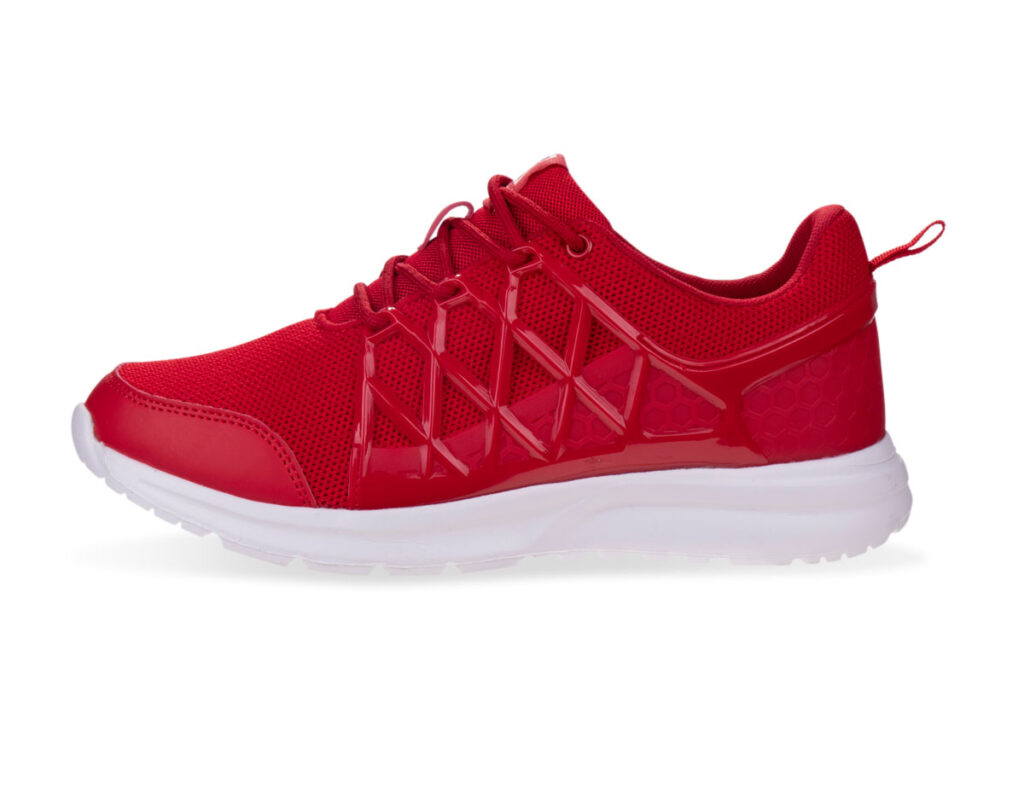
Firstly we take a product photo to add a drop shadow here we work with a red footwear. After opening the photo in Adobe Photoshop we need to create a clipping path around the photo as we showed our last tutorial.
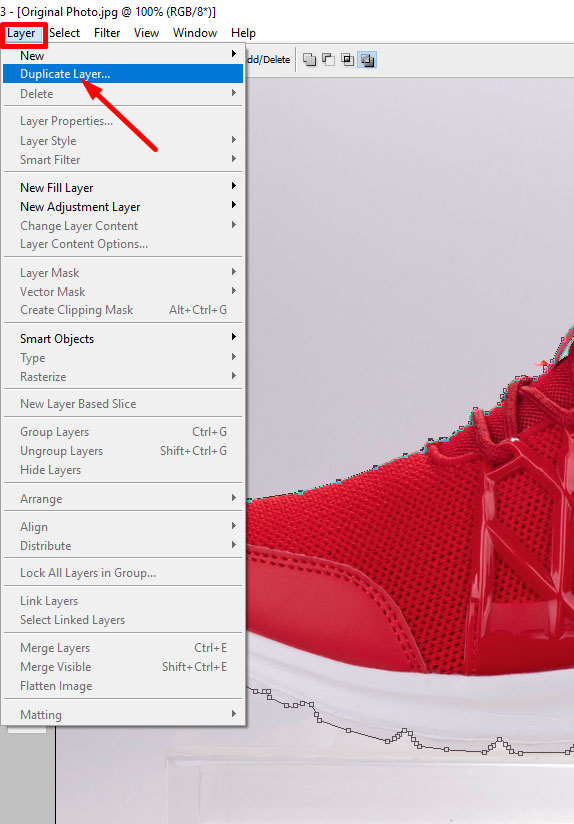
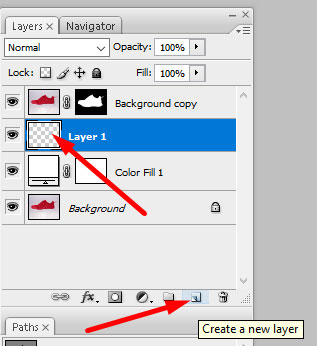
#Step 2 Make New Copy Layer
Make a new layer using layer bar on the top of Adobe Photoshop. You can follow the photo below:
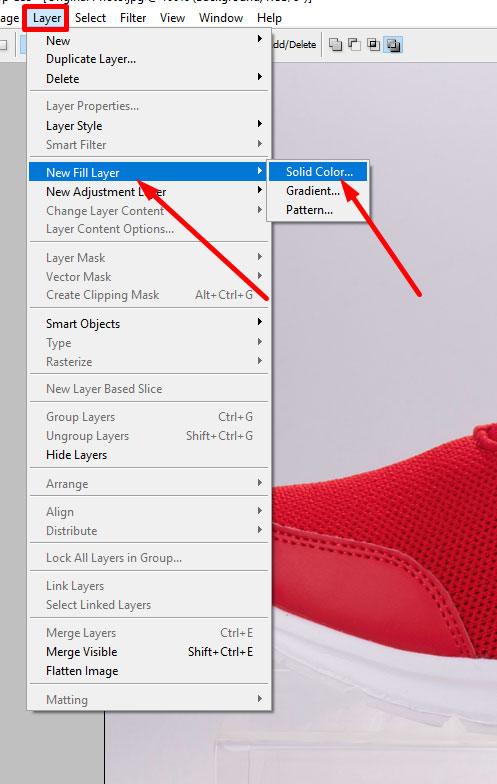
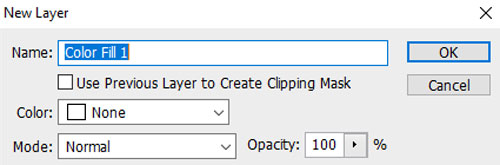
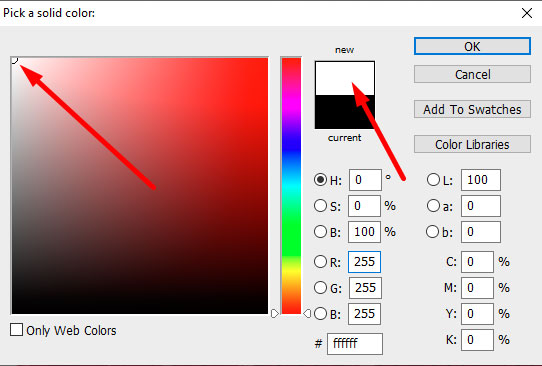
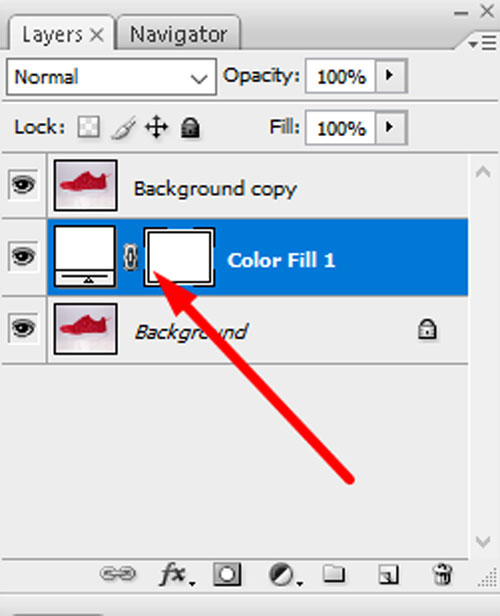
#Step 3 New Fill Layer
Now we need a new fill layer with solid white color. Just follow the simple step following photos
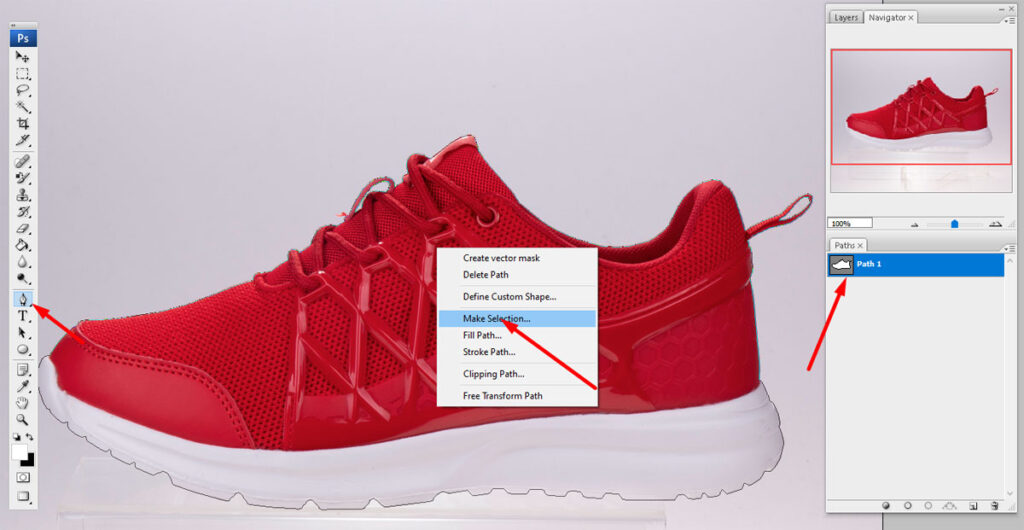
#Step 4 Add a Layer Mask:
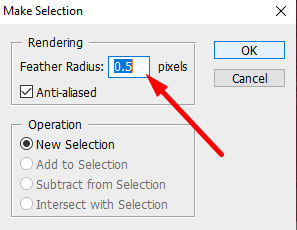
In this step we are going to add a mask layer. To make a mask layer at first we have to make selection the path which we created before.
Now select the new copy layer and click on the add layer mask option on the below of the layer bar.
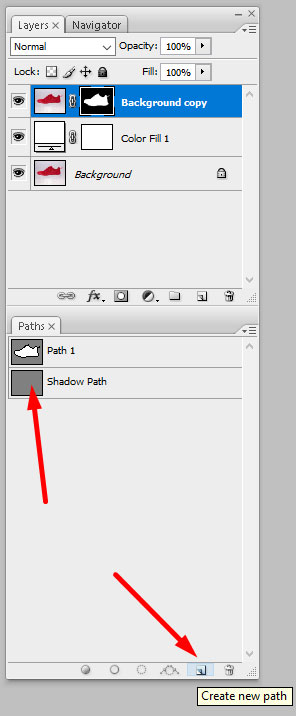
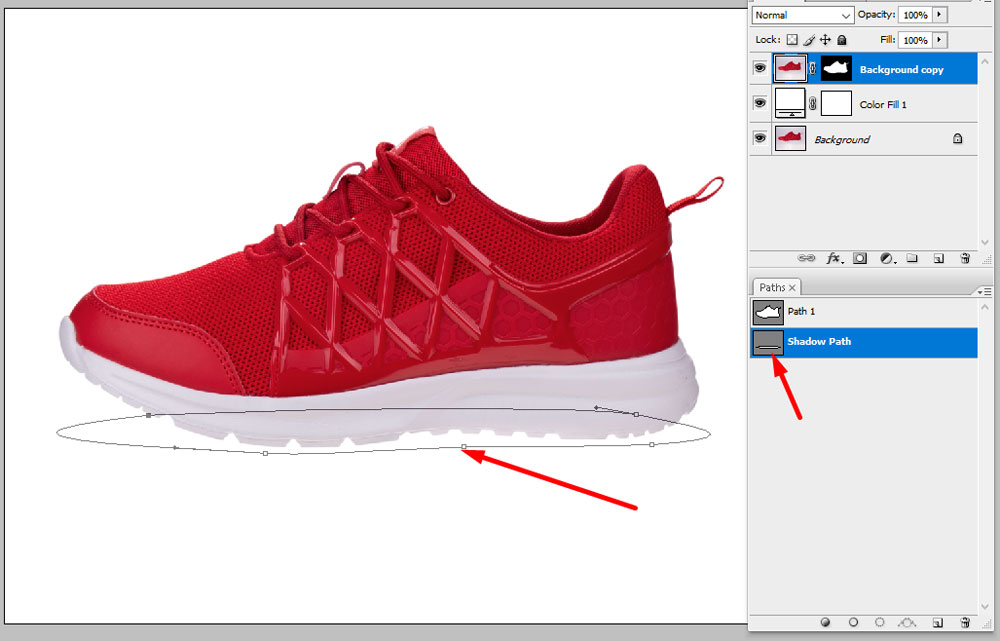
#Step 5: Create a Shadow Shape:
For creating a shadow shape we need to “create a new path”. You can follow the photo below and rename it as shadow path:
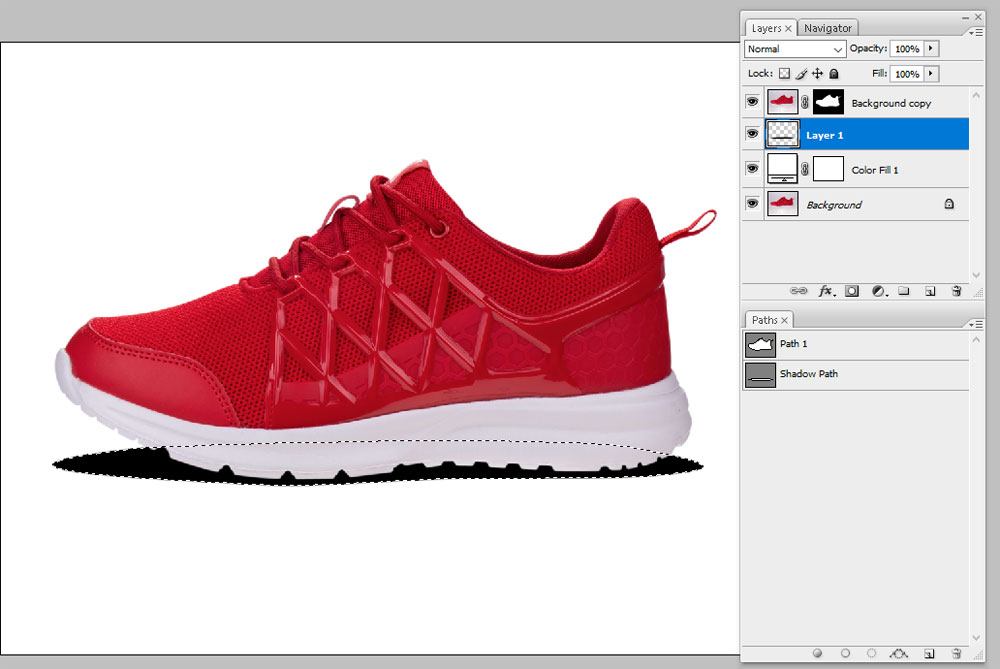
After that we need to create a new layer just below the masked layer. So click on “create new layer” icon on the bottom of the layer panel and rename it shadow layer.
Now select the new path we created and make a path like below. This path is depending on the object on which you want to add a drop shadow.
Then make a selection to the path and fill it with black color.
Do you know how to change the color of an image in Photoshop?
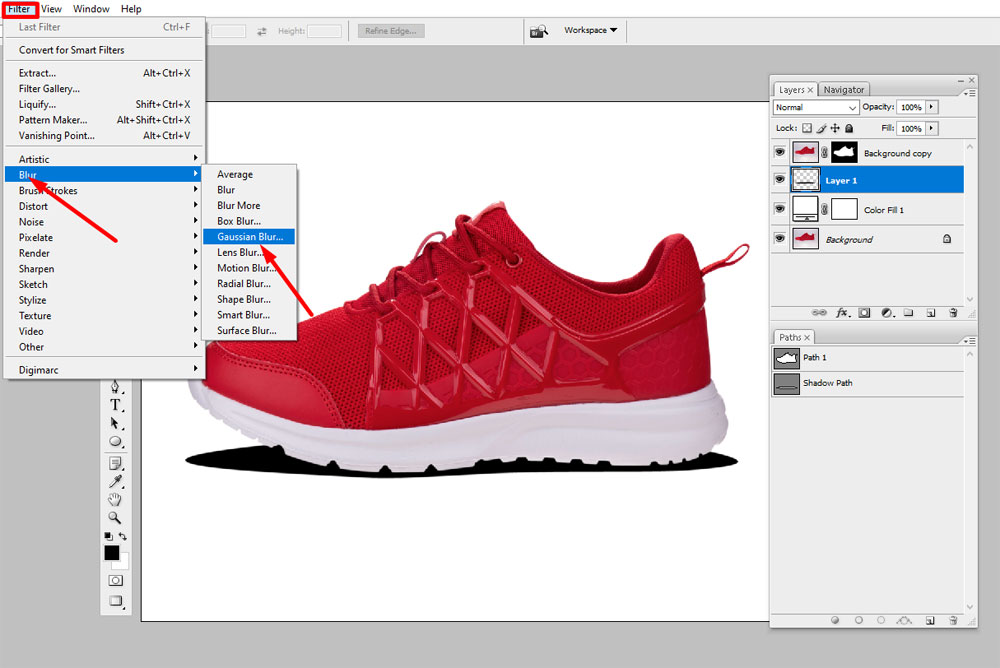
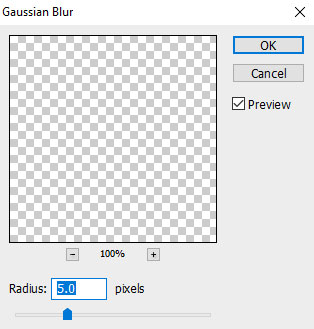
Select the shadow layer then click filter from the top bar there you can see blur next select Gaussian Blur. Don’t forget to deselect the path selection.
Now set radius 5.0 and click ok
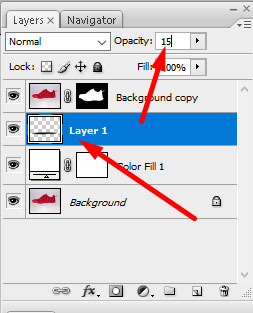
Reduce the opacity of the shadow layer to 15%
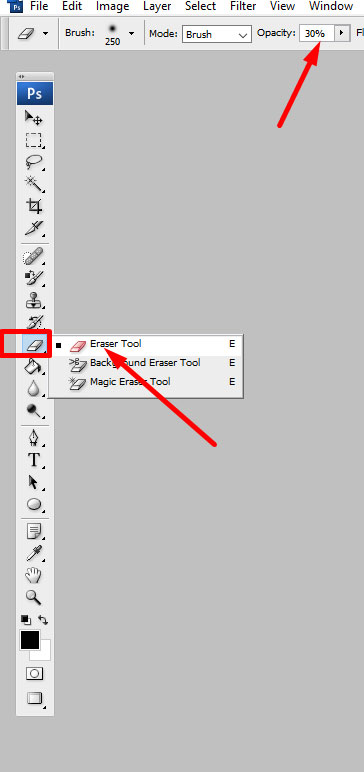
#Step 7 Use Eraser:
In this step we will make a perfect look of the shadow. So we select eraser and set the opacity 30%
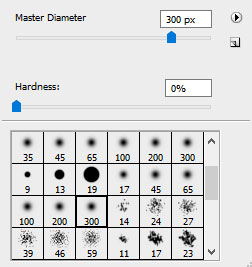
and after that click the right button of the mouse and reduce the hardness of the eraser to 0%
and move the eraser on the front and backside of the shadow.
Do You Need a Professional to add Drop Shadow on Your Product Photo